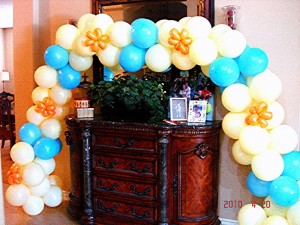
Helium can significantly increase the cost of your decorations so making a balloon arch without helium, like this one, is a money saver. It’s also pretty darn easy!
I am not a professional balloon decorator. I’m a mom – which means I get to be a jack of all trades and decorating for birthday parties has always been my assigned task. I want their parties to be special but I don’t want to spend a fortune, either, so I look for ways to do things myself.
This arch is 18 feet long and I made it in an hour. Here’s how:
Balloon Arch Supplies:
- 72 cream 12″ latex balloons
- 20 blue 12″ latex balloons
- 5 size 260 orange twisting balloons
- 30 feet of fishing line
- one electric air pump
- one hand balloon pump
Step 1 – Inflate the Balloons
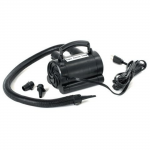
All of the cream balloons need to be inflated and paired into balloon duplets (two balloons tied off together at their ends). If I had to do this manually by inflating them with my mouth…well….we’d never have any balloon arches at our house. I used an electric air pump like this one at Amazon. It costs about $25 and is the one we use to inflate our pool toys. It can run for 20 minutes before it needs to cool down but that was enough time for me to inflate all of the 72 cream balloons.
Anytime you do something repeatedly, it helps to come up with a rhythm. I quickly discovered that pinching balloons between my thumb and index finger repeatedly also caused my thumb to cramp up so, tip, use your index and middle fingers to do the heavy work.
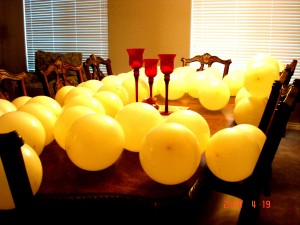 My “rhythm” (although simple and perhaps laughable) was to sit on the floor with the pile of un-inflated balloons in a pile next to me. I would hold one balloon between my index and middle fingers of my left hand and slip it over the air nozzle while holding the second balloon of the duplet between the index and middle fingers of my right hand. As soon as the left balloon was done, I slipped the right balloon over the nozzle, inflated it to the desired size and then quickly tied the two balloons together. I tossed each finished duplet away from me and my six year old rounded them up and put them on the dining room table for me. (Gotta love little helpers!)
While the air pump cooled down, I twisted the duplets together to form “quads” of balloons (a set of four balloons twisted together). Take two balloon duplets and twist them together in the center by wrapping one balloon over and under the other balloons in the set. This secures the balloon quad. This step took about 5 minutes.
Repeat the process with the blue balloons to form 5 blue balloon quads.
At this point, you should have 18 cream balloon quads and 5 blue balloon quads.
Step 2 – Assemble the Arch
Here’s where you have alternatives. Normally, to do a balloon arch without helium, you would use a frame around which to wrap the balloons. The frame may be PVC pipe curved to form an arch, it may be wire, it could be some wooden dowels with a curved top piece. However, if you’re like me, not only do you not have PVC and wire frames laying around the house but they’re the last thing on your mind when you’re getting ready for a party. Balloon arch frames also need to be supported at their base with a stand of sufficient size to support the arch and keep it in place. If you’re in a pinch, do what I did and use fishing line. Then you can either drape the arch over something (furniture, window frame) or attach it to the wall with reusable, sticky hooks.
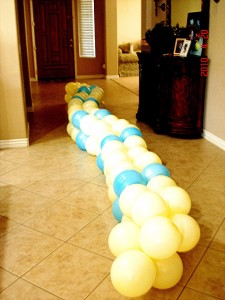 Cut a 20 foot length of fishing line and tie one end around the joined ties of a set of cream balloons. With a second set of cream balloons, wrap 2 of the balloons in the quad around the fishing line and then twist the two balloons around each other and up and over the other balloons to secure them to the fishing line. Push the second quad down so it rests nicely against the first balloon quad. Do this with all of the remaining balloon quads, inserting a blue quad after every 3 cream quads.
It took about 15 minutes to get the balloon quads attached to the fishing line and, I’ll admit, I kept getting tangled in my own line. Fortunately, fishing line is pretty forgiving and it never knotted up on me.
Step 3 – Dressing Up Your Balloon Arch
I wanted the balloon arch to have a little something extra so I decided to attach some balloon flowers made from the size 260 twisting balloons. I used orange only because I have a thing for the mix of white, blue and orange.
I followed the instructions for making a balloon flower (minus the stem) from this video:
Of the entire arch, the flowers were the most difficult. These do not inflate well with my electric pump so I used a hand pump. Several steps were additionally challenging but, again, I found a rhythm that worked for me. First, leave more than just a bare nub at the end of the balloon. Leave yourself about an inch or two of un-inflated balloon because after you make all the required twists, that balloon gets pretty full and hard to twist.
Second, I had no problem folding the loop in half but when it came to making the two twists to separate the balloon into thirds, the first twist would invariably untwist as I was forming the second twist. To stop that from happening, sit down and place one forearm over the first twist while working on the second twist. This will keep things in place while you finish this step.
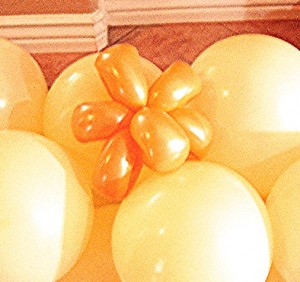 But it was that final twist, where you need to work with the 3 layers pushed together that gave me the most trouble. My hands are too small to get all the way around the darn thing!
I finally managed to complete that step only by holding the balloon in place on my lap, pulling one side of the balloon away from the other to get my hand around the center and then twisting. Although I needed 5 flowers I had to make 7 because 2 popped during this step. (If you’re going to make balloon decorations, expect a few “pops” along the way!)
I used fishing line to tie each of the flowers into place on the balloon arch. Make sure you tie the fishing line all the way around the line that is in the center of your balloon arch.
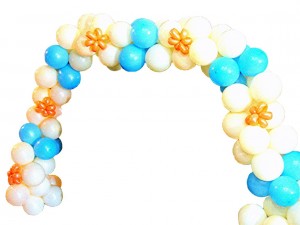
Finished Balloon Arch Without Helium
I propped the arch up around a piece of furniture and attached it to some glass sconces with tape. (Didn’t want to damage the paint on my walls with tape.) Once assembled, the balloon arch is very easy to move – big, but easy to move. Because I haven’t used helium, the arch should hold its shape for several days, especially since the temperature is still a bit cool inside.
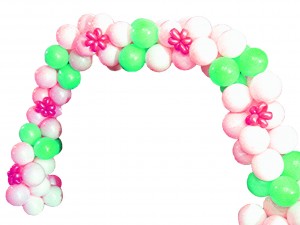
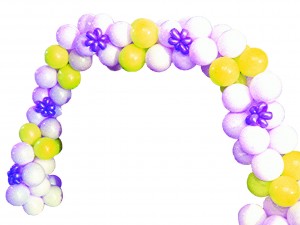
To display the arch without the background, I used my digital imaging software to remove the background. The other neat thing you can do with the software is test out other colors for your arch. I “created” additional versions of the arch – one in pink and green and one in purple and yellow. Both would be perfect balloon arches for a little girl’s birthday party.
The last thing my friends and family would say about me is that I’m crafty so if I can make this balloon arch without helium, anyone can.
You can also attach other decorations besides flowers. You could make balloon butterflies or attach Mylar sports balloons for a boy’s party or wrap the arch in greenery for an outdoor party.

3 comments for “Balloon Arch Without Helium”